
So I've been decorating my bathroom along the "beach theme" and it's been progressing wonderfully! I've painted the entire bathroom, added personalized picture frames, added seashells and white beach sand to the bathroom, and put some personalized jars that's filled with sand and seashells on the counters. I would love to show you all pictures, but that's another blog for another time!
Today's DIY project are my light switch and outlet covers that I redecorated in seashells! It turned out even better than I expected!

So how to turn a plain o' light switch cover and an outlet cover into this? Well, these are the items you'll need:
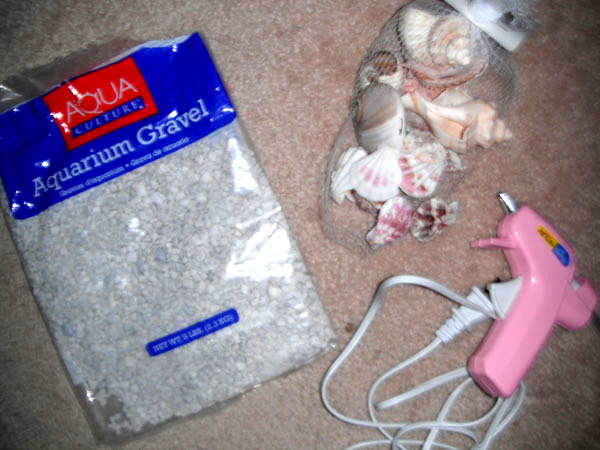
2. Aquarium gravel. Can be bought at Walmart or the pet store for an affordable price. You'll need these tiny rocks to fill in the white spaces on the covers.
3. Hot glue gun. Can be bought cheap at Walmart or a craft store.
So here's the steps:

1. Of course, you'll need to take the covers out.
2. Take out all of the seashells from the bag and choose your likings. Make piles of the small seashells and big seashells. Most likely, you'll used almost all of the small ones because you want to be considerate and remember that you'll have to screw the covers back on and you want to make sure there's room for the light switch to turn on and off, and it's kind of hard to select all of the big seashells. But you can apply some of the larger ones on the corners of the covers.


3. Before you actually start gluing all of the seashells on the covers, make sure to plan and play around with the shells to see how you'll like it.
4. Next, start hot gluing! How fun! Some of the shells, like the flat ones, I call it, but also have other names like the Lion's Paw, Scallop, Pecten Raveneli, you'll want to glue the outline/edges of the insides.
5. Make sure the shells stay in place! Gently hold/press the shells for a few seconds and make sure it's stable, otherwise, hot glue it some more!
6. After you have glued all of the seashells, you'll then see all of the empty spots that needs to be covered. That's where the aquarium rocks come in handy. They're tiny enough to fill in all of those smaller spots where smaller rocks or shells might not be able to fill.
7. Repeat step 5 for the aquarium rocks and make sure they stay in place. They're smaller and more fragile for the glue to stick them in place. So gently holding them in place will surely make them stick on.

8. Again, make sure you remember that you'll have to screw the covers back. So you don't want to glue too much around switch lights or the screws. This happened to me, and I couldn't put the screws in because a shell was in the way or some of the rocks were too close to where I had to screw the covers back. In the end, I had to remove some of the little rocks and had to re-glue it again. But they still turned out lovely!
9. Do the same process for all of your covers!
And here's my outcome:

They look great, right? Not bad for my first time, I'll say! I love 'em!
Here's the final look!


Thank you so much for taking the time to read! I hope to see your DIY Seashell Makeover creations as well! Please leave a comment! Thanks!

nice post, I have been covering switch and plug plates for a few years and collect my own shells - now they are really personal. Don't you love the feeling of "I made this"? great1
ReplyDelete